Complete Guide on How to Repair Industrial Instruments?
Industrial instruments play a critical role in ensuring the smooth functioning of manufacturing plants, processing units, and production lines. From pressure sensors to temperature controllers and flow meters, these instruments monitor, measure, and control vital processes in industrial environments. Over time, due to wear and tear, environmental conditions, or electrical issues, these instruments may start malfunctioning, leading to inaccurate readings or system breakdowns. Knowing how to repair industrial instruments is essential for companies to maintain efficiency, safety, and cost-effectiveness.
In this guide, we’ll walk you through the steps, tips, and precautions for repairing industrial instruments effectively. We’ll also cover best practices for maintenance, common issues, and when professional repair services are required.
Step-by-Step Approach to Industrial Instruments Repair
Repairing industrial instruments requires a combination of technical knowledge, safety precautions, and practical experience. Proper repair not only restores the instrument’s functionality but also ensures the safety and efficiency of your industrial processes. Here is a comprehensive step-by-step approach:
1. Identify the Problem
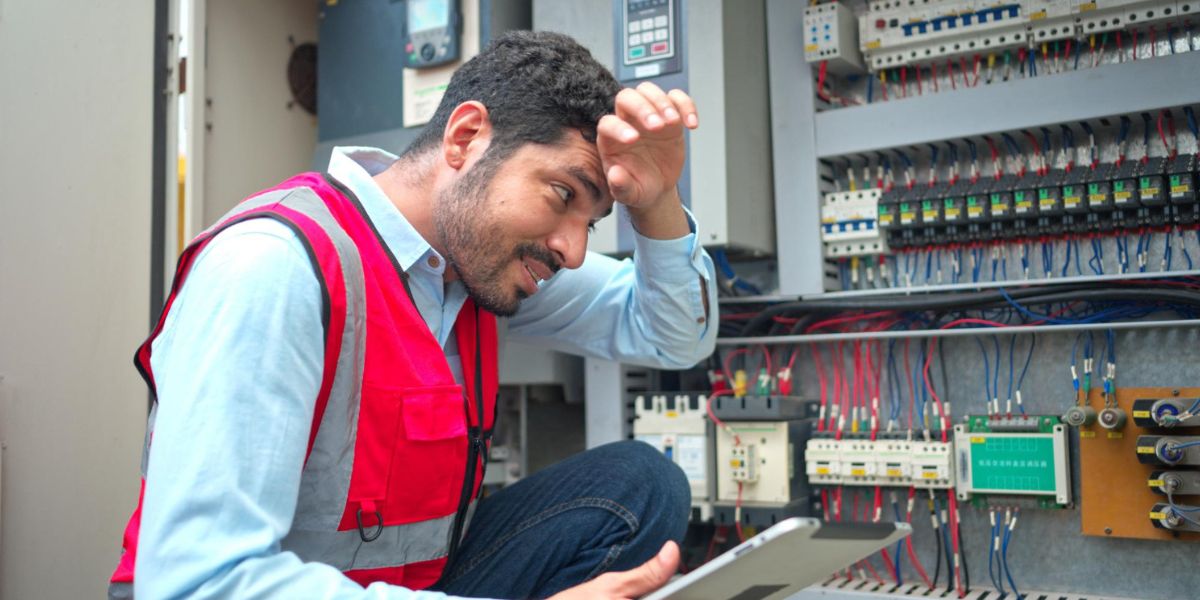
The first and most crucial step in repairing industrial instruments is accurate problem identification. Begin with a visual inspection to spot obvious signs of damage such as burnt circuits, frayed wires, corrosion, or cracked casings. Pay attention to unusual readings, error codes, or abnormal instrument behavior.
In addition to visual checks, run any built-in diagnostic tests if the instrument supports them. For digital instruments, software-based diagnostics can highlight specific sensor failures or communication errors. By understanding the root cause rather than just treating the symptoms, you reduce the risk of repeated issues and save valuable repair time.
Documenting the observed problems at this stage also helps guide the next steps and can be useful if professional assistance is needed later.
2. Disconnect Power and Ensure Safety
Industrial instruments often operate on high voltages and currents. Before touching any internal components, ensure the power supply is completely turned off. Remove batteries or disconnect the main electrical feed where applicable.
Safety is paramount. Use insulated tools and wear protective gloves, goggles, and anti-static wrist straps. Industrial environments can also have residual electrical charges even after disconnection, so testing with a voltmeter before starting work is recommended. Proper grounding prevents both electrical accidents and damage to sensitive electronic components.
Taking the time to prioritize safety at this stage avoids potential injuries and costly damage to the instrument.
3. Refer to Manufacturer Manuals
Every industrial instrument comes with a manufacturer’s manual, which is an invaluable resource during repairs. These manuals provide details about wiring diagrams, circuit layouts, component specifications, and recommended handling procedures.
Ignoring manufacturer guidelines can lead to incorrect repairs or further damage. For instance, using the wrong replacement component could cause signal drift or even permanent failure. Manuals also often include troubleshooting charts for common issues, saving time and effort in identifying problems.
For complex instruments like programmable logic controllers (PLCs) or multi-sensor systems, adhering to the manual is critical to maintain proper calibration and functionality.
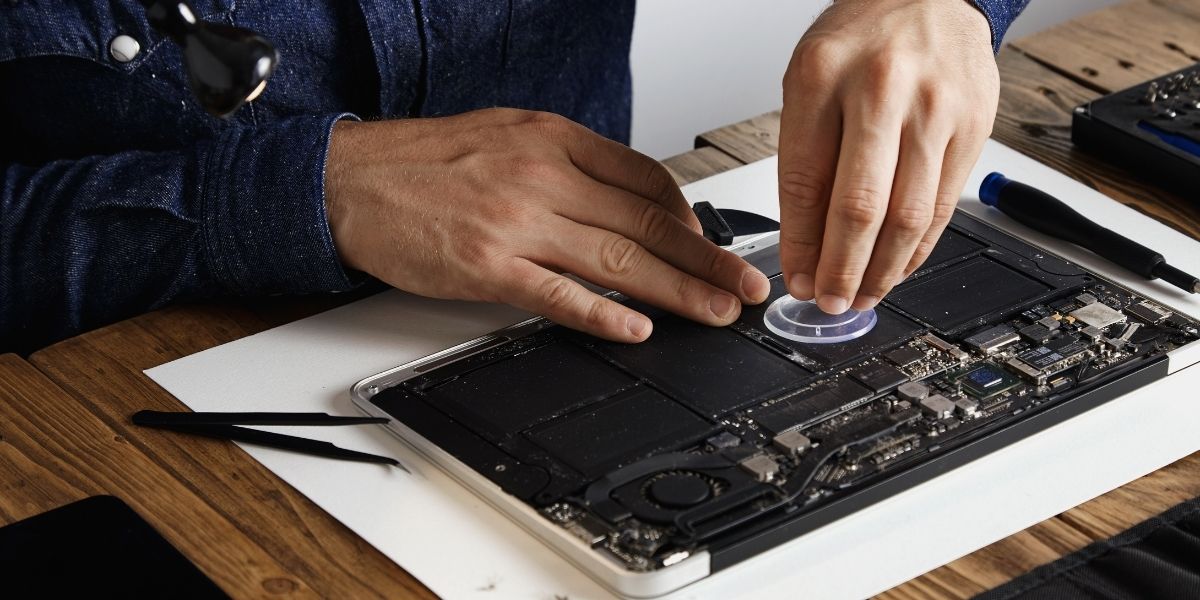
4. Disassemble Carefully
After understanding the problem and ensuring safety, begin disassembling the instrument. Handle each component gently, especially delicate sensors and printed circuit boards (PCBs). Anti-static mats and wrist straps are highly recommended when working with electronics to prevent electrostatic discharge, which can instantly damage sensitive components.
Label each part or take photos during disassembly to ensure easy reassembly. Organising screws, connectors, and small components prevents accidental loss and reduces errors when putting the instrument back together.
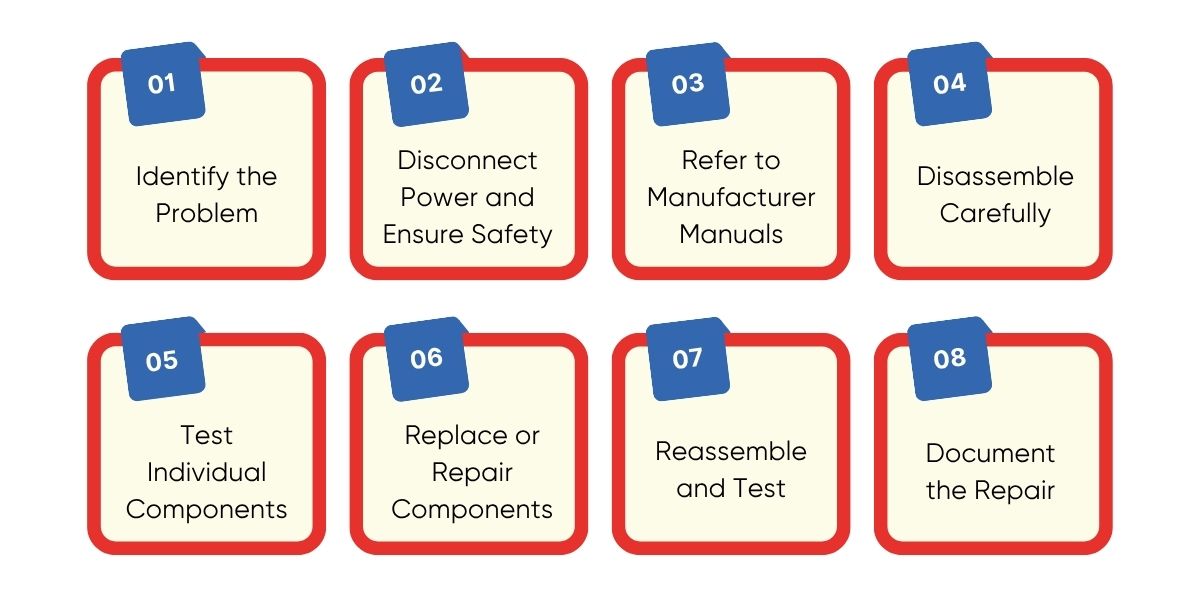
5. Test Individual Components
Once disassembled, test individual components to pinpoint faults. A multimeter is often sufficient to check resistors, capacitors, diodes, and wiring continuity. More advanced tools, like oscilloscopes or signal analysers, can help detect subtle faults in sensors, transmitters, or control circuits.
Look for signs of component wear, such as bulging capacitors, burnt resistors, or inconsistent sensor readings. If you detect a failing component, verify its specifications and confirm compatibility with replacements. Testing thoroughly ensures you don’t waste time replacing parts unnecessarily.
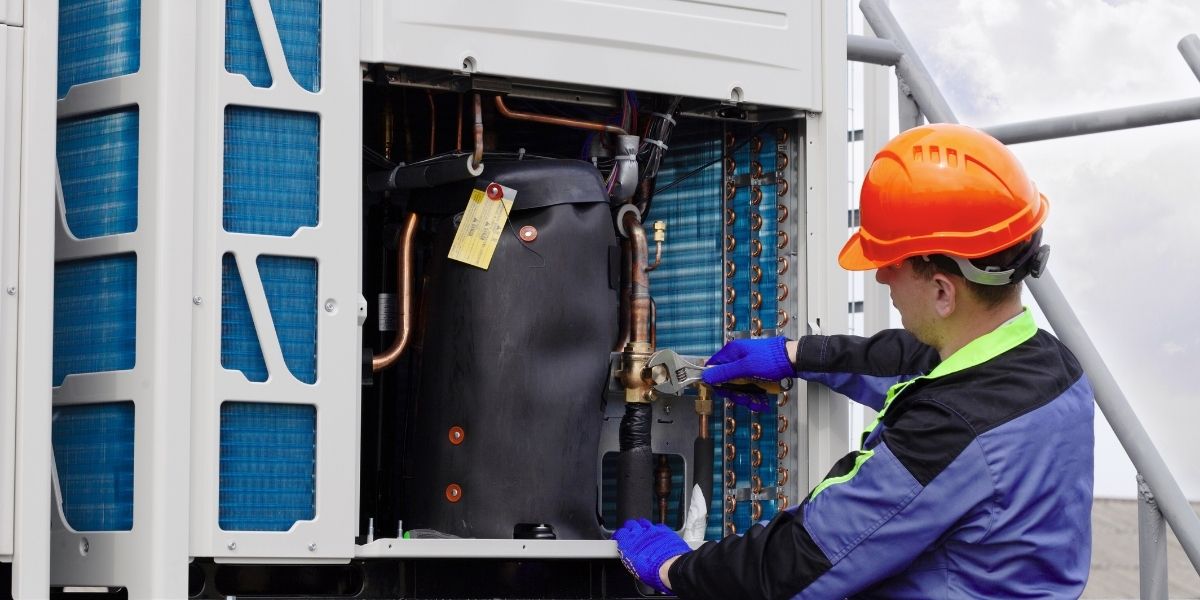
6. Replace or Repair Components
After identifying the faulty components, decide whether repair or replacement is appropriate. Minor issues, such as loose connectors or corroded contacts, can often be fixed with cleaning, soldering, or tightening.
For more serious faults like damaged PCBs, worn sensors, or malfunctioning microcontrollers, replacement is the safest option. Always use genuine parts recommended by instrument repair experts such as Horizon Elect Devices in Dubai. Using inferior components can lead to repeated failures or compromise measurement accuracy.
In some cases, repair may involve recalibrating sensors or adjusting the mechanical alignment of components like valves or actuators. Proper attention to these details ensures long-term reliability.
7. Reassemble and Test
Once repairs or replacements are complete, carefully reassemble the instrument. Ensure all screws, connectors, and components are properly secured. Avoid forcing parts into place, as this could damage delicate elements.
After reassembly, power on the instrument and conduct thorough testing. Check calibration against standard benchmarks, run functional tests, and observe performance under actual operating conditions. This step confirms that the repair was successful and that the instrument will function reliably in the field.
For complex instruments, multiple testing cycles may be needed to ensure accuracy, especially if the device interfaces with other industrial systems.
8. Document the Repair
Maintaining a detailed record of the repair process is essential. Include the original problem, diagnostic steps, components replaced, adjustments made, and any calibration performed.
Documenting repairs has several advantages:
- Provides a reference for future troubleshooting.
- Helps comply with industrial quality and safety standards.
- Tracks the instrument’s maintenance history, which is valuable for audits and operational planning.
Clear documentation also helps technicians share knowledge across teams, making subsequent maintenance or repairs faster and more efficient.
Ensuring Long-Term Efficiency with Industrial Instruments Repair
Understanding how to repair industrial instruments is essential for anyone involved in industrial operations or facility management. From basic troubleshooting to professional repair services, taking the right steps ensures that instruments operate reliably and accurately. Regular maintenance, timely repairs, and collaboration with trusted industrial electronics repair service providers like Horizon Elect Devices contribute to smoother operations, safety, and cost efficiency.
Whether you are dealing with pressure gauges, temperature sensors, or complex control panels, a structured approach to repair can save time, money, and prevent production losses. By combining practical repair skills with preventive maintenance, you can ensure that your industrial instruments remain in top condition for years to come.